


How would you like to have your very own one-stop entertainment system that not only gives you the ability to play your favorite movies and your favorite songs but your favorite retro video games too? And you can build it yourself?
This project uses Retro Pie, which acts like an Emulationstation and also builds on Raspbian, RetroArch, and other technologies and programs, like KODI (which is how you can stream your favorite shows and songs).
Plus, Retro Pie supports many retro gaming systems for Raspberry Pi, such as favorite like Nintendo 64 (N64), Play Station, Game Boy Advance, and Atari Lynx.
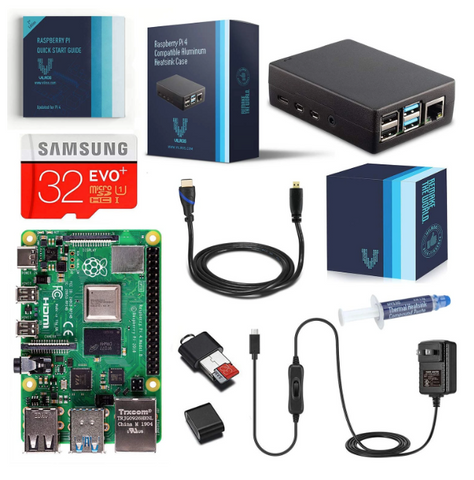
Although you can use older versions of Raspberry Pi to build a retro gaming console, we definitely recommend the Raspberry Pi 4 Model B Basic Starter Kit. Not only does this latest version of Raspberry Pi have higher processing speed and improved performance, the kit comes with multiple components you’ll need to create your new console system:
- Raspberry Pi 4 Model B (we recommend the 4GB version for the best performance)
- Vilros 3A USB-C Power Supply Designed for Pi 4 with On/Off Switch
- Vilros HDMI(female)-Micro HDMI (male) Adapter
- Vilros Clear Case with 2 Covers
- Heatsink for Pi 4 (Set of 4)
Here are the additional components you’ll need:
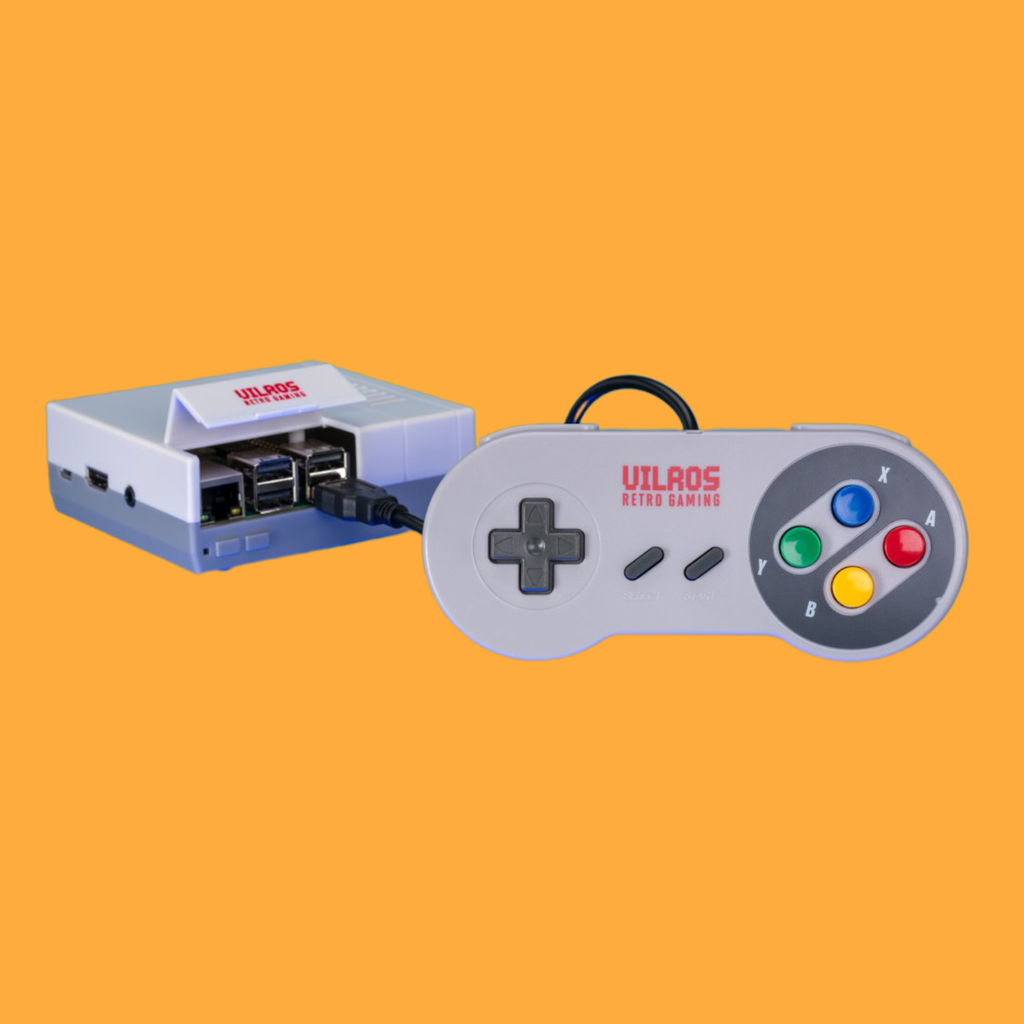
- Vilros Retro Pie Arcade Gaming Accessory Kit
- Mini 2.4 G Wireless Keyboard with Touch Pad (useful for set-up and also playing games!)
- Official Raspberry Pi 7” Touchscreen LCD Display (this monitor really delivers for gaming, but you can try your own tv or monitor too)
- 32GB Micro SD card
- Ethernet Cable (optional – otherwise, you’ll need to use WiFi)
Installing Retro Pie for Raspberry Pi 4
Here’s your step-by-step instructions for getting Retro Pie hooked up with your Raspberry Pi 4:
Raspbian Buster Desktop Image Flashed to Your SD Card
First go here to download a Raspbian Buster Desktop Image to your computer. (if you don’t have it, you’ll also need Etcher so you can flash the Raspbian image to your SD card).
Note: make sure your SD card is inserted in your computer when flashing the image. Once it’s done, you can transfer the card to your Raspberry Pi 4
Connect to the Internet
Next, you’ll need to be online via either ethernet or WiFi so you can setup Raspbian on your Raspberry Pi (just follow the instructions).
Download Retro Pie
Launch a terminal window in the top-left corner of your Raspberry Pi 4 screen. To download the Retro Pie setup files, key in:
git clone –-branch fkms_rpi4 -–depth=1 –-single-branch https://github.com/RetroPie/RetroPie-Setup.git
Set Up Directory
In order to enter the setup directory, use:
cd RetroPie-Setup
FKMS from Github
Next, you’ll need the FKMS version of Retro Pie that goes with Raspberry 4, which you can get from Github. Key in:
git fetch && git checkout fkms_rpi4
Execute Setup Script
For the setup script execution, key in:
cd RetroPie-Setup
Perform Basic Install
With the setup script executed, you should get a screen that allows you to “Perform a Basic Install” as the first option.
Start Emulationstation
With installation complete, you’re ready to exit the setup and start Emulationstation. Just key in:
emulationstation
Play!
Now you’re ready to use Retro Pie with your Raspberry Pi 4.
Here’s a video showing just some of the retro games you can now try!
If you’ve enjoyed this project, come back and check out more projects for Raspberry Pi 4 (and more!) on our Vilros Projects blog.